


Table of Contents
- Signs of Hair Breakage You Should Not Ignore
- How Styling Causes Hair Breakage
- Choosing the Best Heat Protectant for Hair
- Detangling and Washing Without Causing Damage
- Protective Styles and Nighttime Hair Care
- Collagen for Hair Growth and Internal Support
- Post-Styling Recovery and Tool Maintenance
- Conclusion
- Frequently Asked Questions
Last Updated: September 28, 2026
Signs of Hair Breakage You Should Not Ignore
Hair breakage is the snapping of the hair shaft, and it usually shows up long before you notice thinning. Healthy Living Proteins hears from customers over 25 who assume their hair is "just shedding" when it is actually breaking.
Short Broken Pieces vs. Shed Hair
Shed hair comes out with a small white bulb at the root. Broken pieces do not. They are short, uneven, and often show up on your pillow or bathroom floor without that bulb. If most of what you see is short fragments, you are dealing with breakage, not normal shedding.
Texture Changes That Signal Damage
Damaged hair feels different before it looks different. Watch for:
- Rough, raised hair cuticle that snags when you run a finger down a strand
- Loss of elasticity, so wet hair snaps instead of stretching
- Split ends that travel up the hair shaft
- Brittle hair that feels dry no matter how much conditioner you use
How Styling Causes Hair Breakage
Styling damages hair through three main routes: heat, tension, and chemical processing. Each one weakens the hair shaft in a different way, and most people stack all three without realizing it. The American Academy of Dermatology's hair care guidance notes that repeated heat and chemical exposure is a leading cause of structural hair damage.
Heat, Tension, and Chemical Processing
Heat strips moisture and can bubble the water inside the hair shaft. Tension pulls at the follicle. Chemical processing breaks down the bonds holding hair together. Combine them, and breakage is almost guaranteed.
Porosity and Product Absorption
Hair porosity is how well your hair absorbs and holds moisture. High-porosity hair soaks up products fast but loses moisture just as quickly, making it more prone to breakage. Low-porosity hair resists absorption, so products sit on top. This changes which products actually work for you.
Choosing the Best Heat Protectant for Hair
The best heat protectant for hair coats the hair shaft and slows heat transfer, and you should apply it to damp hair before any thermal styling. Skipping it is a common mistake, but the type you pick and how you apply it matter just as much.
Match the Protectant to the Tool Temperature
Heat damage is a function of temperature and time. Most home flat irons and curling irons run between 300°F and 450°F, and blow dryers push air between 120°F and 200°F. As a rule of thumb:
- Fine, damaged, or color-treated hair: keep hot tools at or below 300°F and use a protectant rated for that range.
- Medium, healthy hair: 300°F-375°F is usually safe with a protectant.
- Thick, coarse, or highly textured hair: you may need 375°F-410°F to get a smooth pass, but only with a protectant built for high heat.
Read the Ingredient List, Not the Label
"Heat protection" is a marketing phrase, not a regulated claim. What matters is the ingredient class:
- Silicones (dimethicone, cyclopentasiloxane, amodimethicone) form a smooth film that reduces friction and slows heat transfer. They are the workhorse of most protectants.
- Hydrolyzed proteins (hydrolyzed wheat, silk, or rice protein) temporarily fill gaps in the cuticle, which helps hair resist snapping during styling.
- Copolymers and quaternium compounds (VP/DMAPA acrylates copolymer, polyquaternium-55) create a lightweight thermal barrier that rinses out cleanly.
- Panthenol and glycerin add moisture but do not protect against heat on their own, they need a film-former alongside them.
How Much to Apply (and Where)
More is not better. Over-applying weighs hair down and makes the iron drag, adding mechanical damage on top of heat damage.
- Fine hair: a dime-sized amount for shoulder-length hair.
- Medium hair: a nickel-to-quarter-sized amount.
- Thick or coily hair: section by section, roughly a pea-sized amount per section.
The Unique Angle: Porosity Changes the Formula
The right protectant depends on your hair's porosity, not just its thickness.
- High-porosity hair (soaks up water fast, dries fast, feels rough) needs a protectant with hydrolyzed protein plus a silicone film. The protein fills the raised cuticle; the silicone seals it. Without both, heat escapes through the gaps and fries the cortex.
- Low-porosity hair (floats in water, takes forever to dry, feels smooth) needs a lightweight, water-based protectant with a single light silicone. Heavy protein or oil-based formulas sit on top, attract heat, and can leave hair stiff and brittle.
- Medium porosity can use either, but a balanced protein-and-silicone formula is the safest default.
What to Avoid
- Two-in-one "heat protectant + hairspray" products. The alcohol dries the cuticle and makes it more brittle under heat.
- Applying protectant to dirty hair. Buildup plus protectant equals baked-on residue that transfers to your iron.
- Using protectant as a substitute for technique. It buys a wider safety margin, not unlimited heat. If you hear sizzling or see steam, the temperature is too high.
Detangling and Washing Without Causing Damage
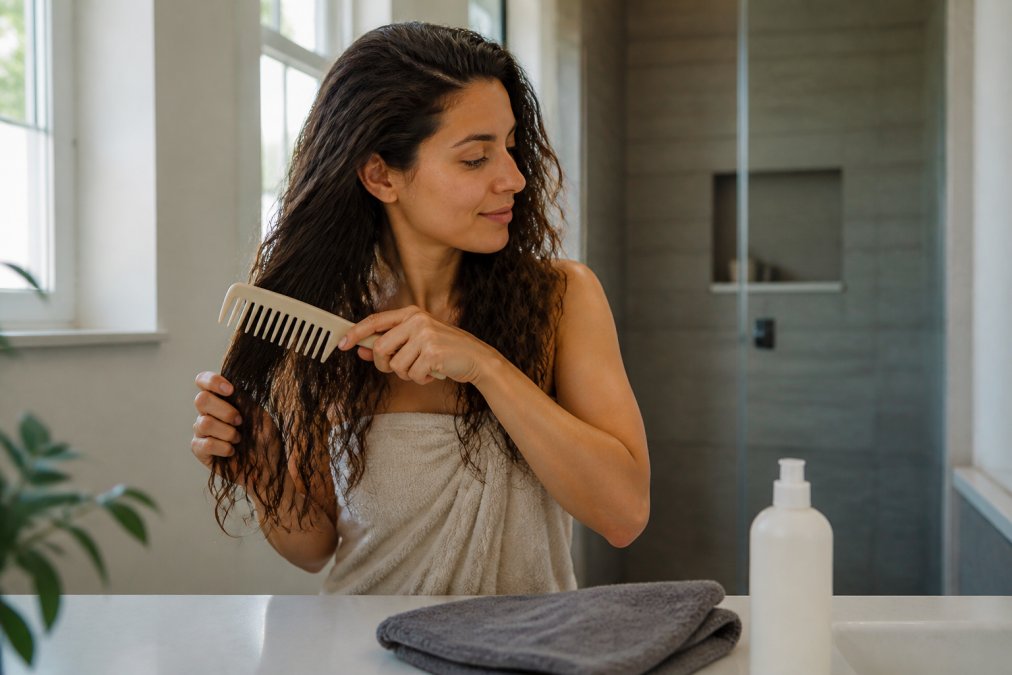
Detangle wet hair with a wide-tooth comb, working from the ends up, never from the roots down. Wet hair stretches and breaks easily, so this order matters more than the tool.
Protective Styles and Nighttime Hair Care
Protective styles and nighttime care reduce friction and tension while you sleep, when a lot of damage happens. A silk pillowcase or satin cap cuts friction between your hair and the pillow.
Collagen for Hair Growth and Internal Support
Collagen for hair growth works from the inside by supporting the proteins your body uses to build strong hair, skin, and nails. Hydrolyzed collagen is broken into small peptides that absorb more easily than whole collagen.
| Product | Price | Best For |
|---|---|---|
| Grass-Fed Bovine Collagen Peptides | $41.99 | Skin elasticity, hair strength, nails |
| Wild-Caught Marine Collagen Peptides | $39.99 | Faster absorption, pescatarian diets |
| Multi Collagen Peptides & Creatine | $49.99 | Muscle and joint support plus hair |
| Multi Collagen Peptides (Types I, II, III, V, X) | $44.99 | Full-spectrum daily support |
Post-Styling Recovery and Tool Maintenance
Two things most people never think about: what to do for your hair in the 48 hours after a big styling session, and how to keep tools from becoming a damage source. Both directly affect how much breakage you see.
Grass-Fed Bovine Collagen Peptides →

The 48-Hour Post-Styling Reset
After a high-heat or high-tension style, the cuticle is raised, moisture is depleted, and hair is temporarily more fragile. The goal of the next two days is to let the cuticle lay flat and restore moisture before stressing hair again.
Day 1 (the day of styling):
- Do not brush or comb the style out aggressively. Finger-comb or use a wide-tooth comb only.
- Skip ponytails, buns, or any style that pulls at the scalp. Let hair hang loose or use a claw clip that does not crease it.
- If you used a lot of product, do not wash it out the same night unless your scalp is irritated. A gentle wash the next morning is better.
Day 2:
- Wash with lukewarm water and a gentle, sulfate-free shampoo. Focus on the scalp; let suds run through the ends.
- Follow with a moisturizing conditioner on mid-lengths and ends. Leave it on the full label time, usually 3-5 minutes.
- Apply a leave-in conditioner or light protein treatment if hair feels stretchy or mushy when wet. Skip protein if it feels stiff; add moisture instead.
Day 3 and beyond:
- No heat for at least 72 hours after a high-heat session. If you must style, air-dry or use a heatless method.
- Do a deep conditioning mask once in this window if hair still feels dry.
Signs Your Hair Needs a Longer Break
Extend the no-heat window to a full week if you notice any of these:
- Hair snaps easily when wet instead of stretching
- Ends feel crunchy or velcro-like when you run your fingers through
- You see more short broken pieces than usual on your pillow or in the shower
- Your scalp is tender or you see small bumps along the hairline (a sign of tension damage)
Tool Maintenance: The Overlooked Damage Source
A dirty or worn tool damages hair even when your technique is perfect. What to check and how often:
Flat irons and curling irons:
- Wipe the plates with a damp cloth or alcohol wipe after every 2-3 uses, once fully cool. Buildup bakes onto the plates and transfers to your hair on the next pass, snagging strands.
- Inspect plates monthly. Ceramic and titanium coatings chip over time. Once you see bare metal or a rough patch, replace the tool, bare metal creates hot spots and drags on the cuticle.
- Check the cord and hinge for looseness. A wobbly plate does not clamp evenly, forcing extra passes.
Blow dryers:
- Remove and rinse the rear filter or lint screen every 2-4 weeks, or more often with pets or high humidity. A clogged filter restricts airflow, making the heating element run hotter.
- Check the nozzle and barrel for dust and hair buildup. A partially blocked nozzle creates uneven airflow and hot spots.
- If the dryer smells like burning or airflow has weakened, it is overheating. Replace it.
Brushes and combs:
- Remove loose hair from your brush after every use. A full brush pulls and tangles the hair you are trying to detangle.
- Wash brushes and combs with warm water and a drop of shampoo every 1-2 weeks. Buildup transfers oils and product back onto clean hair.
- Replace boar-bristle and cushioned brushes when bristles splay or the cushion pad cracks. Splayed bristles scratch the cuticle instead of smoothing it.
A Simple Weekly Maintenance Rhythm
If you do nothing else, adopt this cadence:
- After every styling session: wipe plates once cool, remove hair from brushes.
- Weekly: rinse the blow dryer filter, wash brushes and combs.
- Monthly: inspect plates for chips, check cords and hinges, look at the dryer nozzle.
- Every 3-6 months: replace anything with visible wear, chipped plates, splayed bristles, cracked cushion pads, weakened airflow.
Tools are the cheapest variable to control in a breakage-prevention routine, and the one most people ignore. A $30 replacement brush or a $5 filter rinse can do more for your ends than a $40 serum.
Conclusion
Breakage rarely comes from one bad habit. It builds from heat, tension, friction, and gaps in internal nutrition, showing up as brittle hair and split ends before you see thinner strands. Fix the styling habits, protect your hair at night, and support it from the inside.
Frequently Asked Questions
How to style hair to avoid breakage?
Start by applying a heat protectant before any thermal styling tool touches your hair. Use the lowest heat setting that gets the job done, and keep the tool moving rather than holding it in one spot. Air-dry when possible, use a wide-tooth comb on damp hair instead of a brush, and limit tight hairstyles that pull at the roots. Giving your hair rest days between styling sessions makes a noticeable difference over time.
What is the biggest cause of hair breakage?
Mechanical damage from heat tools, aggressive brushing, and tight styles is the leading cause for most people. Repeated friction against the hair cuticle weakens the hair shaft until it snaps. Chemical processing and over-processing compound the problem. Addressing how you handle your hair day to day matters more than any single product. Small changes in detangling, drying, and styling habits add up quickly.
How can I strengthen my hair from the inside out?
Diet plays a real role in hair elasticity and strength. Protein, iron, and collagen support the hair follicle and the hair shaft. Hydrolyzed collagen peptides, like those in Healthy Living Proteins' Grass-Fed Bovine Collagen Peptides, are broken into smaller molecules for easier absorption. Pairing internal support with gentle styling habits gives your hair the best chance to recover and stay strong.
Does heat styling always lead to hair breakage?
Not always. Heat styling causes breakage when you skip heat protectant, use temperatures above what your hair texture can handle, or repeat the process without giving hair a break. Using a quality heat protectant, keeping tools on low to medium heat, and limiting sessions to once or twice a week reduces the risk significantly. Occasional styling with proper precautions is far less damaging than daily high-heat routines.